Stacking 3D Printed Shield Parts
Many people are trying to print lots of parts — especially for 3D printed face shields — to respond to 2020’s Covid-19 crisis. I’ve seen a way to stack masks using Luban, and one using Prusa Slicer and telling it about gaps to fill.
Neither of these methods, however, allow you to flip the items in the stack — which helps for printed that aren’t perfectly vertical, by allowing you to not need support material — each one is supported on the mirrored copy beneath it. (Actually, I’m rotating them and not mirroring them, but it could be done.)
Here’s a method using OpenSCAD, which is basically lets you generate 3D printable objects programmatically.
Take a look at the steps before trying it out:
- Get a 3D model (an STL file) of the shield part you want to print, and find out how tall it is. (Some slicers will tell you the dimensions of an imported object).
- Download and install OpenSCAD.
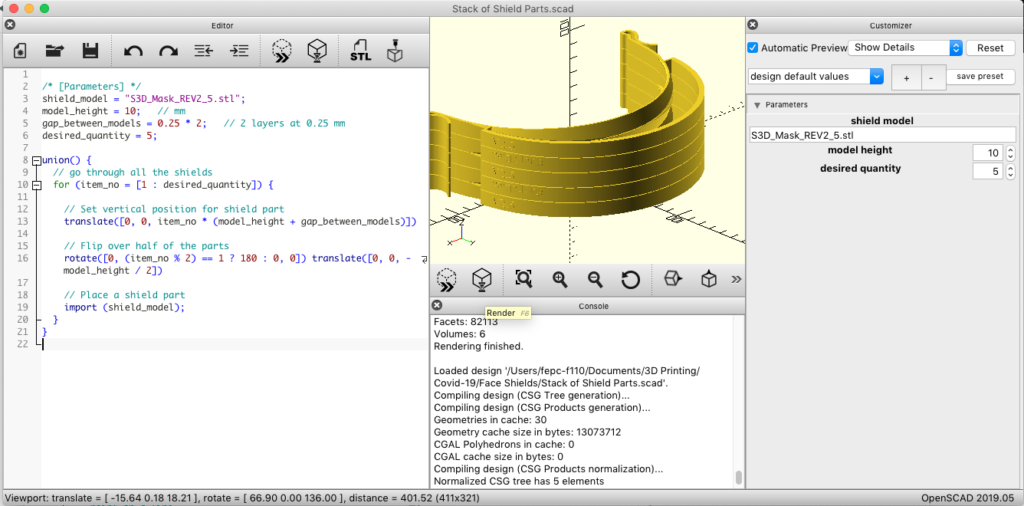
- Open OpenSCAD, and paste in this script.
/* [Parameters] */
shield_model = "S3D_Mask_REV2_5.stl";
model_height = 10;   // mm
gap_between_models = 0.25 * 1;   // 1 layer at 0.25 mm
desired_quantity = 5;

union() {
  // go through all the shields
  for (item_no = [1 : desired_quantity]) {

    // Set vertical position for shield part
    translate([0, 0, item_no * (model_height + gap_between_models)])

    // Flip over half of the parts
    rotate([0, (item_no % 2) == 1 ? 180 : 0, 0]) translate([0, 0, -model_height / 2])

    // Place a shield part
    import (shield_model);
  }
}- Save the file in the same folder are your STL file.
- Edit the parameters at the start of the file.
- You’ll want to specify the name of your STL file for the shield mask.
- You’ll need to enter in the height of the model.
- Desire on your gap size. It should be a multiple of your layer height.
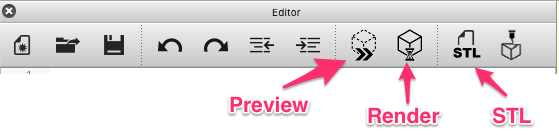
- Click the Preview Button (F5) in OpenSCAD to see what your result will look like.
- When you are happy with it, click on the Render Button (F6) to actually generate results suitable for printing. This will take several minutes.
- Finally, hit the STL Button (F7) to save the resulting STL file.
And then open it up in your slicer software and turn it into ready-to-print g-code.
Leave a Reply