How To Mirror A PDF
This page explains one way to mirror a PDF on a Mac, especially for use with flipping a sewing pattern to be used with a projector. (If you are trying to mirror an image for an iron-on transfer, it’s a lot easier to bring up the ‘Layout’ section of the print dialog and tick the ‘Flip Horizontally’ checkbox).
In this method we do the following:
- open the PDF in Preview
- save the PDF as an image
- flip the image
- save the image as a PDF
We also want to confirm the PDF dimensions to be sure we did it right.
This does have the downside of rasterizing the image — changing it from instructions on where to drawn lines to a picture of where the lines are drawn; if you zoom in far enough, you’ll see the individual pixels. If you have enough pixels, it shouldn’t be an issue; if it is, look into alternatives; I believe Adobe Acrobat (the paid version) can do this, and some vector art programs (think Inkscape, Illustrator or designer) can import PDFs as vector artwork and let you manipulate from there — but this method is quick, uses software already on your computer, and should have enough quality.
Open the PDF
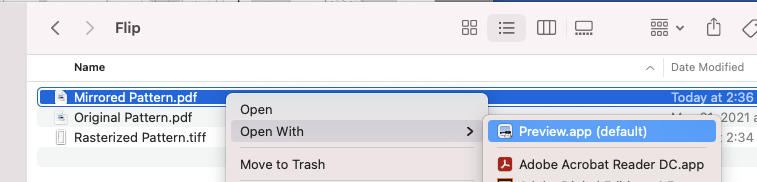
Find your document in the Finder. Right-click on it and open with Preview.
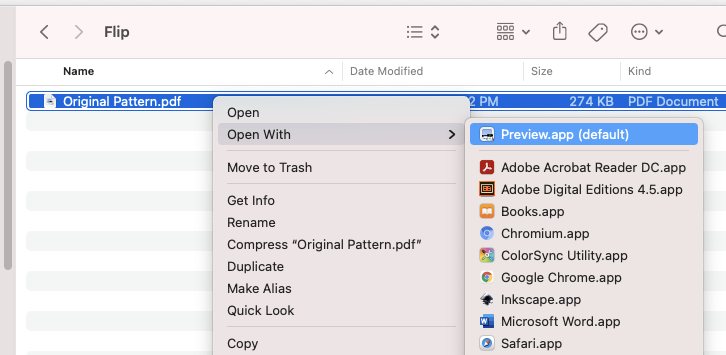
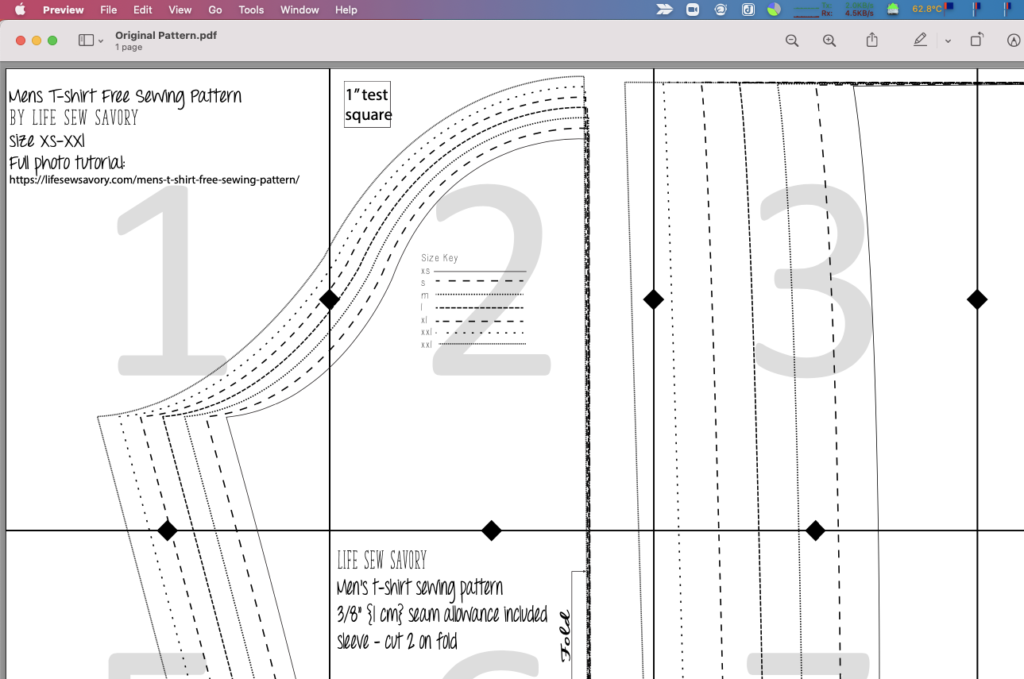
Now you’ll see the PDF in Preview, Apple’s build-in PDF viewer.
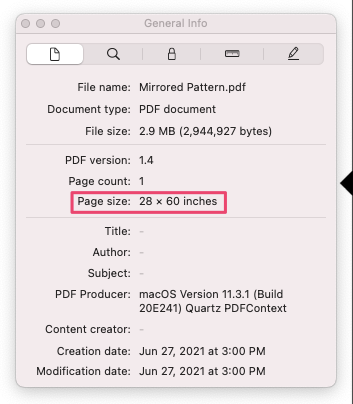
Find The Page Size
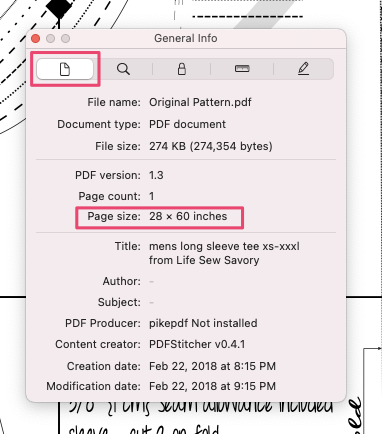
To be certain we do it right, the final document needs to be the same size as the initial document.
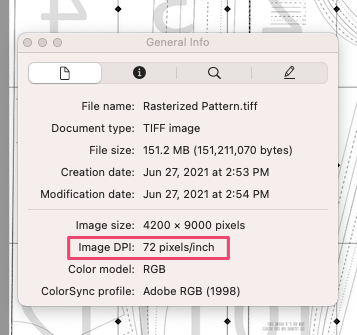
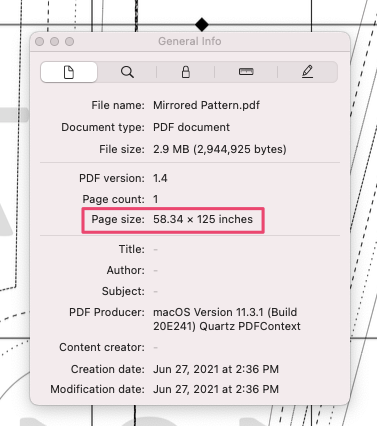
Press ⌘-I (or, from the menu, choose Tools -> Show Inspector) to bring up the inspector. Ensure the left-most section is selected. It will tell you your page size.
Save As An Image
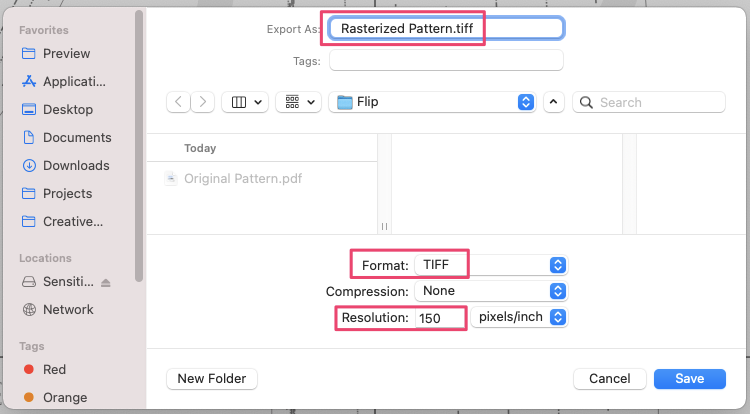
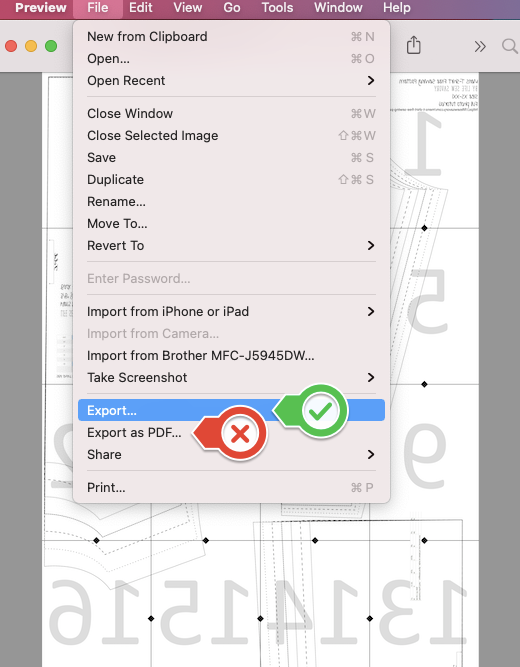
Choose File -> Export to bring up the “Export As” dialog.

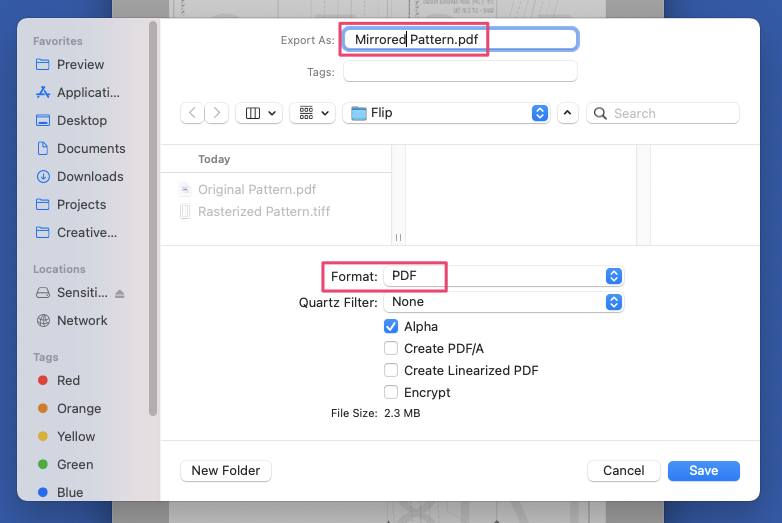
In the “Export As” dialog,
- specify a name to save the image version of the document
- decide where you want to save the file, and remember the location
- set the Format to TIFF or PNG
- The default resolution is 72 pixels per inch.
- Honestly, it is probably good enough for projector patterns
- If you leave it at the default, you get to skip one of the upcoming steps
- If you do decide to bump it up to ensure more detail, remember which number you put in here
- hit the Save button
Flip The Image
We’ve now saved an image file onto disk. First you need to find it and open it with Preview.
With your image file open, go to Tools -> Flip Horizontal.
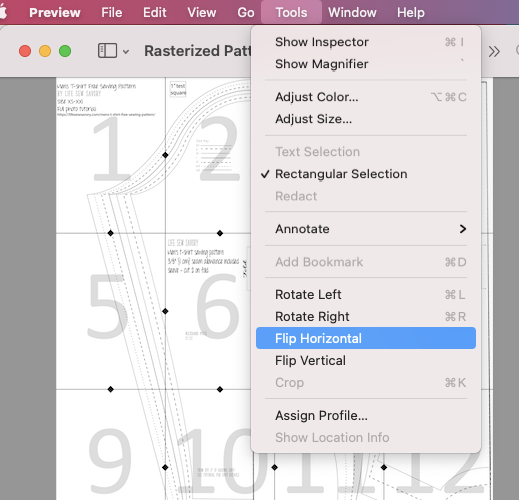
Poof! Your image has been flipped.
Set The Image’s Size
If you left the image resolution at the default of 72 pixels per inch, skip this step.
Frustratingly, even though Preview saved the file at a specific pixels per inch size, it doesn’t remember what that size was when you reloaded the image. [I swear the image metadata has a spot to record this data! Why, Preview, why?!]
You can see this for yourself if you bring up the inspector window.
What we need to do is “resize” the image.
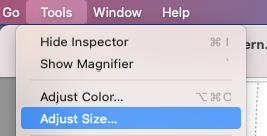
From the menu, choose Tools -> Adjust Size.
In the resulting dialog, type in your image’s desired resolution.
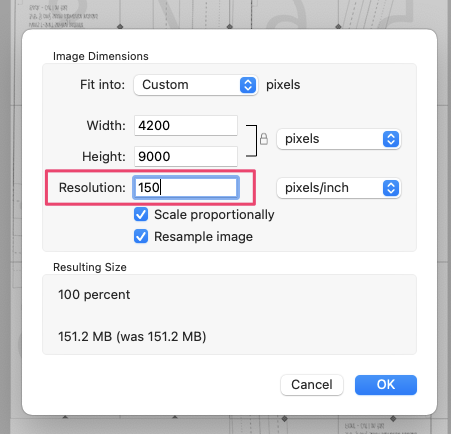
Hit OK.
Save The Image As A PDF
Okay, with the image flipped and sized we can now save it as a PDF.
From the menu, choose File -> Export… (Do not choose File -> Export as PDF… as that will change the page size).
In the “Export As” dialog,
- set the file type to PDF
- specify a name and location
- hit Save
Confirm The Page Size Is The Same
Okay, once more, we need to open the file we just created with Preview.
Press ⌘-I (or, choose Tools -> Show Inspector) and look at the page size.
Ooh! That’s not right. (Happened the first couple of times I tried this. If it happens to you, try again, making sure you keep the image resolution correct and don’t hit the ‘export as PDF’ button).
If you see the right size:
Congratulations, you are done! Open up your file in your normal pattern projector software, and enjoy the mirrored-imageryness of it all.
Leave a Reply